A step by step tutorial on how to use AngularJS with ASP.Net MVC
Precap
Our simple AngularJS with ASP.Net MVC application is already showing off a mixture of two worlds. We started with a plain ASP.Net web applications and molded it, making a base for demonstrating, how at the core level an MVC application can be served as an AngularJS application. Nothing so serious about that. Till now you just served the contents of a MVC view in place of a static HTML page. By the way if you haven’t gone through the previous posts, you can always start it from beginning here. In this post of the series we will be talking about dividing the application into modules (AngularJS) and Areas (ASP.Net MVC).
Match at Next Level
We have already shown how a MVC view can be used for the view template for the AngularJS application. The next thing in AngularJS is modules and these useful in dividing and clubbing the business logic of the application. Say for example you would like to club all the things a Customer can do on your site or there is an Administration part of the site where Admin can control the things. All these interlinked things and functionalities can be and should be bundled together in a single AngularJS module. In the ASP.Net world these things are called Areas, where you club the similar and related functionalities together.
AngularJS modules are not just for the bundling together the business logic for the application navigation but also for the other components like all the API interfaces in a single module for a single service or your custom directives in another one. Similar is not done for the ASP.Net Areas. Don’t worry, we are going to see that with a small example here very soon.
Soon! why ? … why not just jump into it right away. And do sit tight, as in this post you are going to see a lot of code.
Create an Area
It is very simple and Visual Studio makes it very easy for us, just right click on your project and select Add -> Area, give it a name ( in my case i am going to name it as Customer). visual studio create few folders and files. Once new area is created, we will create 2 controllers named Default and Profile in there. Here is the code snippet to these 2 controllers.
// DefaultController.cs
using System.Web.Mvc;

namespace AngularJSwithMVC.Areas.Customer.Controllers
{
    public class DefaultController : Controller
    {
        public ActionResult Index()
        {
            return PartialView();
        }
    }
}
// ProfleController.cs
using System.Web.Mvc;

namespace AngularJSwithMVC.Areas.Customer.Controllers
{
    public class ProfileController : Controller
    {
        public ActionResult Index()
        {
            return PartialView();
        }
        public ActionResult Edit()
        {
            return PartialView();
        }
    }
}
In the above code you can see that there are 3 actions methods defined in total. The methods are also returning the partial views. One point to be noted here is that as soon as you add a view to the area, the NuGet packages for bootstrap, jQuery and Mordernizr will be add to the project. You can remove those packages safely here for this project.
Let’s add views for each respective action methods. Here is the snippet for the views.
<!-- Default/Index.cshtml -->
<div class="panel" ui-view="section"></div>
<!-- Profile/Index.cshtml -->
<div class="panel-body">
    <div class="row">
        <div class="col-md-12">
            <b>Name:</b> {{customer.name}}<br />
            <b>Age:</b> {{customer.age}}<br />
        </div>
    </div>
</div>
<div class="panel-footer">
    <button class="btn btn-warning" ui-sref=".edit">Edit</button>
</div>
<!-- Profile/edit.cshtml -->
<div class="panel-body">
    <div class="row">
        <div class="col-md-12">
            <b>Name:</b><input class="form-control" type="text" ng-model="editingCustomer.name" /><br />
            <b>Age:</b><input class="form-control" type="text" ng-model="editingCustomer.age" /><br />
        </div>
    </div>
</div>
<div class="panel-footer">
    <button class="btn btn-success" ng-click="save()">Save</button>
    <button class="btn btn-warning" ng-click="cancel()">Cancel</button>
</div>
Area Registration
With all that defined, you have to register the MVC Area properly so that the default controller and action method of the area is known by the application. Here is how the CustomerAreaRegistration.cs file looks.
using System.Web.Mvc;

namespace AngularJSwithMVC.Areas.Customer
{
    public class CustomerAreaRegistration : AreaRegistration
    {
        public override string AreaName
        {
            get
            {
                return "Customer";
            }
        }

        public override void RegisterArea(AreaRegistrationContext context)
        {
            context.MapRoute(
                "Customer_default",
                "Customer/{controller}/{action}/{id}",
                new {controller= "Default", action = "Index", id = UrlParameter.Optional }
            );
        }
    }
}
Notice the highlighted line in the above code, this is only line we have modified from the default.
It’s time for the explanation now. This new area (Customer) has the responsibility of showing and editing the customer profile. In future if we need to perform any other operations on the Customers like, view / Edit contact information, or reset password, all the templates for these features should be clubbed in there in this area.
AngularJS Module
The real control is in the hands of AngularJS module. We have to define a new module in AngularJS. This module will have its own config and routing, all related to the customers. to do that first of all we need to define this new module. for the sake of code manageability, we should divide the code for module and its configs in separate files. Let’s create these 3 files in customer sub-directory under modules directory (newly created) of app directory (Scripts -> app -> modules -> customer).
// customer.module.js
(function () {
    'use strict';

    angular.module('customer', ['ui.router']);
})();
// customer.config.js
(function () {
    'use strict';

    angular.module('customer')
        .config(function () {
            // nothing as of now
        });
})();
// customer.route.js
(function () {
    'use strict';

    angular.module('customer')
        .config(['$stateProvider', function ($stateProvider) {
            $stateProvider
                .state('customer', {
                    url: '/Customer',
                    templateUrl: '/Customer',
                    resolve: {
                        customer: function () {
                            console.log('Resolving Customer');

                            var customer = {
                                name: 'John Doe',
                                age: 23
                            };
                            return customer;
                        }
                    },
                    controller: ['$scope', 'customer', function ($scope, customer) {
                        console.log('Customer Controller');

                        $scope.customer = customer;
                        $scope.saveEdits = function (customer) {
                            $scope.customer = customer;
                        }
                    }]
                })
                .state('customer.profile', {
                    url: '/Profile',
                    views: {
                        'section@customer': {
                            templateUrl: '/Customer/Profile'
                        }
                    }
                })
                .state('customer.profile.edit', {
                    url: '/Edit',
                    views: {
                        'section@customer': {
                            templateUrl: '/Customer/Profile/Edit',
                            controller: ['$scope', '$state', '$stateParams', function ($scope, $state) {
                                console.log('Customer Edit Controller');

                                $scope.editingCustomer = angular.copy($scope.customer)

                                var save = function () {
                                    $scope.saveEdits($scope.editingCustomer);
                                    $state.go('^');
                                };

                                var cancel = function () {
                                    $state.go('^');
                                };

                                $scope.save = save;
                                $scope.cancel = cancel;
                            }]
                        }
                    }
                });
        }]);
})();
Remember, for the sake of this tutorial only, I have defined the controllers in-line for these route definition. But, it is always a good practice to code the controllers in the separate files and refer the controllers here by name.
Let’s Goto Meeting …
We now have all the required components. We have to first include these new scripts in the script package for the clients to receive them, and you know how to do that, yes, include them in the BundleConfig.cs. Here is the code snippet showing the modification.
"~/bower_components/bootstrap/dist/js/bootstrap.js",
"~/Scripts/app/modules/customer/customer.module.js",
"~/Scripts/app/modules/customer/customer.config.js",
"~/Scripts/app/modules/customer/customer.route.js",
"~/Scripts/app/app.module.js",
Now, inject this newly created module in app module. Your code should look something like the one shown in the snippet below.
(function () {
    'use strict';

    angular.module('app', ['ui.router', 'customer']);
})();
It’s time to change the angular routing to load that new module on navigation to a particular route. First of all, lets modify the _Layout.cshtml of our main MVC application (remember the we may have a _Layout.cshtml in the Area folder also, which we are ignoring as of now.). Here are the line modified for the file.
As you might have noticed the we have removed the page2 link from the navigation. We should now remove the state definition for the same from the app.route.js This all completes the code for this post and we should be able to compile and run the application.
The output
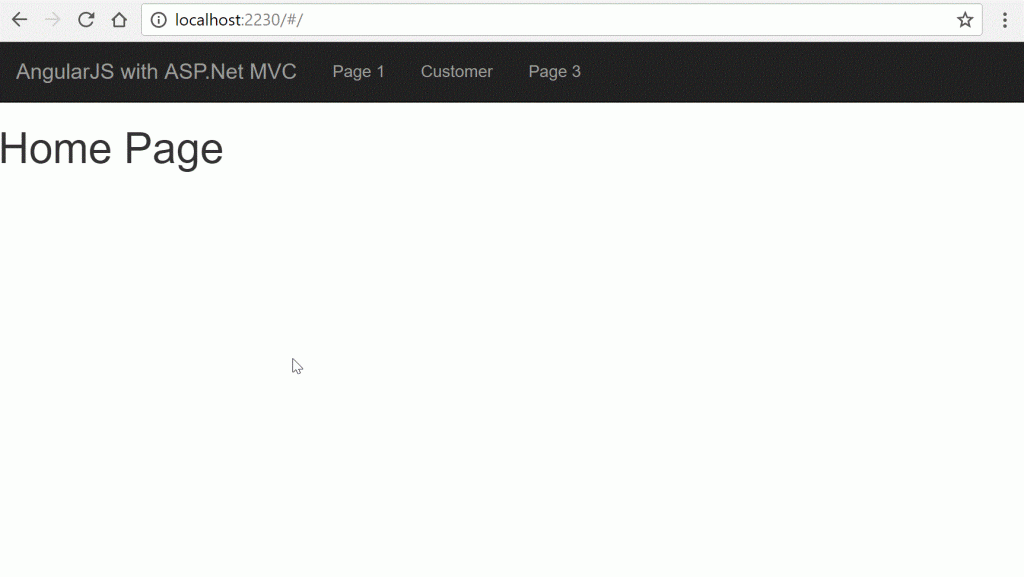
Our new module is now active and is available as a link in the navigation. The code is totally separate and can be easily removed in case we are not interested in loading the module or don’t want that module at all, by simply removing the Area, module directory and a few lines from app module. This increase the manageability of the application code and separates the concerns from each other. Hope you have also, completed the code till here and not faced any issue till now.
In case you have any difficulties or need any clarification, please feel free to leave your comments below. I will try my best to answer the queries as soon as possible.
We are now nearing the end of this series on the topic “AngularJS with ASP.Net MVC”. The only thing which remains here as per the scope of this series is “Content Authorization”. I will continue to the next post and leave you here with your code so that you can play with it and get more clarity on it.
Series Links
Part 1 Part 2 Part 3 Part 4 Part 5 Part 6 Part 7 Part 8 Part 10 Part 11

