A step by step tutorial on how to use AngularJS with ASP.Net MVC
Introduction
There are numerous articles and tutorials about this on the web and even on YouTube, none of them were complete and as satisfying as I wanted them to be. Using AngularJS with ASP.net MVC is a well talked topic and I have drafted a series of posts which will show you how I have done it myself in many of the projects during my learning of Angular and implementing in the small to large scale web applications.
Getting Started
I am going to use Visual Studio 2015 with a few Extensions for this series. Here is the link for you to download these extensions:
Along with that you will require to have node.js and bower package manager installed for getting the required JavaScript libraries. For the starting point here we are going to use a minimal project template, so that I can add the required libraries and components as and when required. This makes the learning easy and the project as lean as possible. The primary language for the project is going to be C#, but you can use VB.Net if you are comfortable with that. I assume that you have a prior knowledge of ASP.Net MVC and JavaScript and also aware of AngularJS in some extent, because I will not be touching all the concepts of these technologies here in this series. Once you have all the required components installed, you are ready to continue on this tutorial.
Create a Web Application Project in Visual Studio
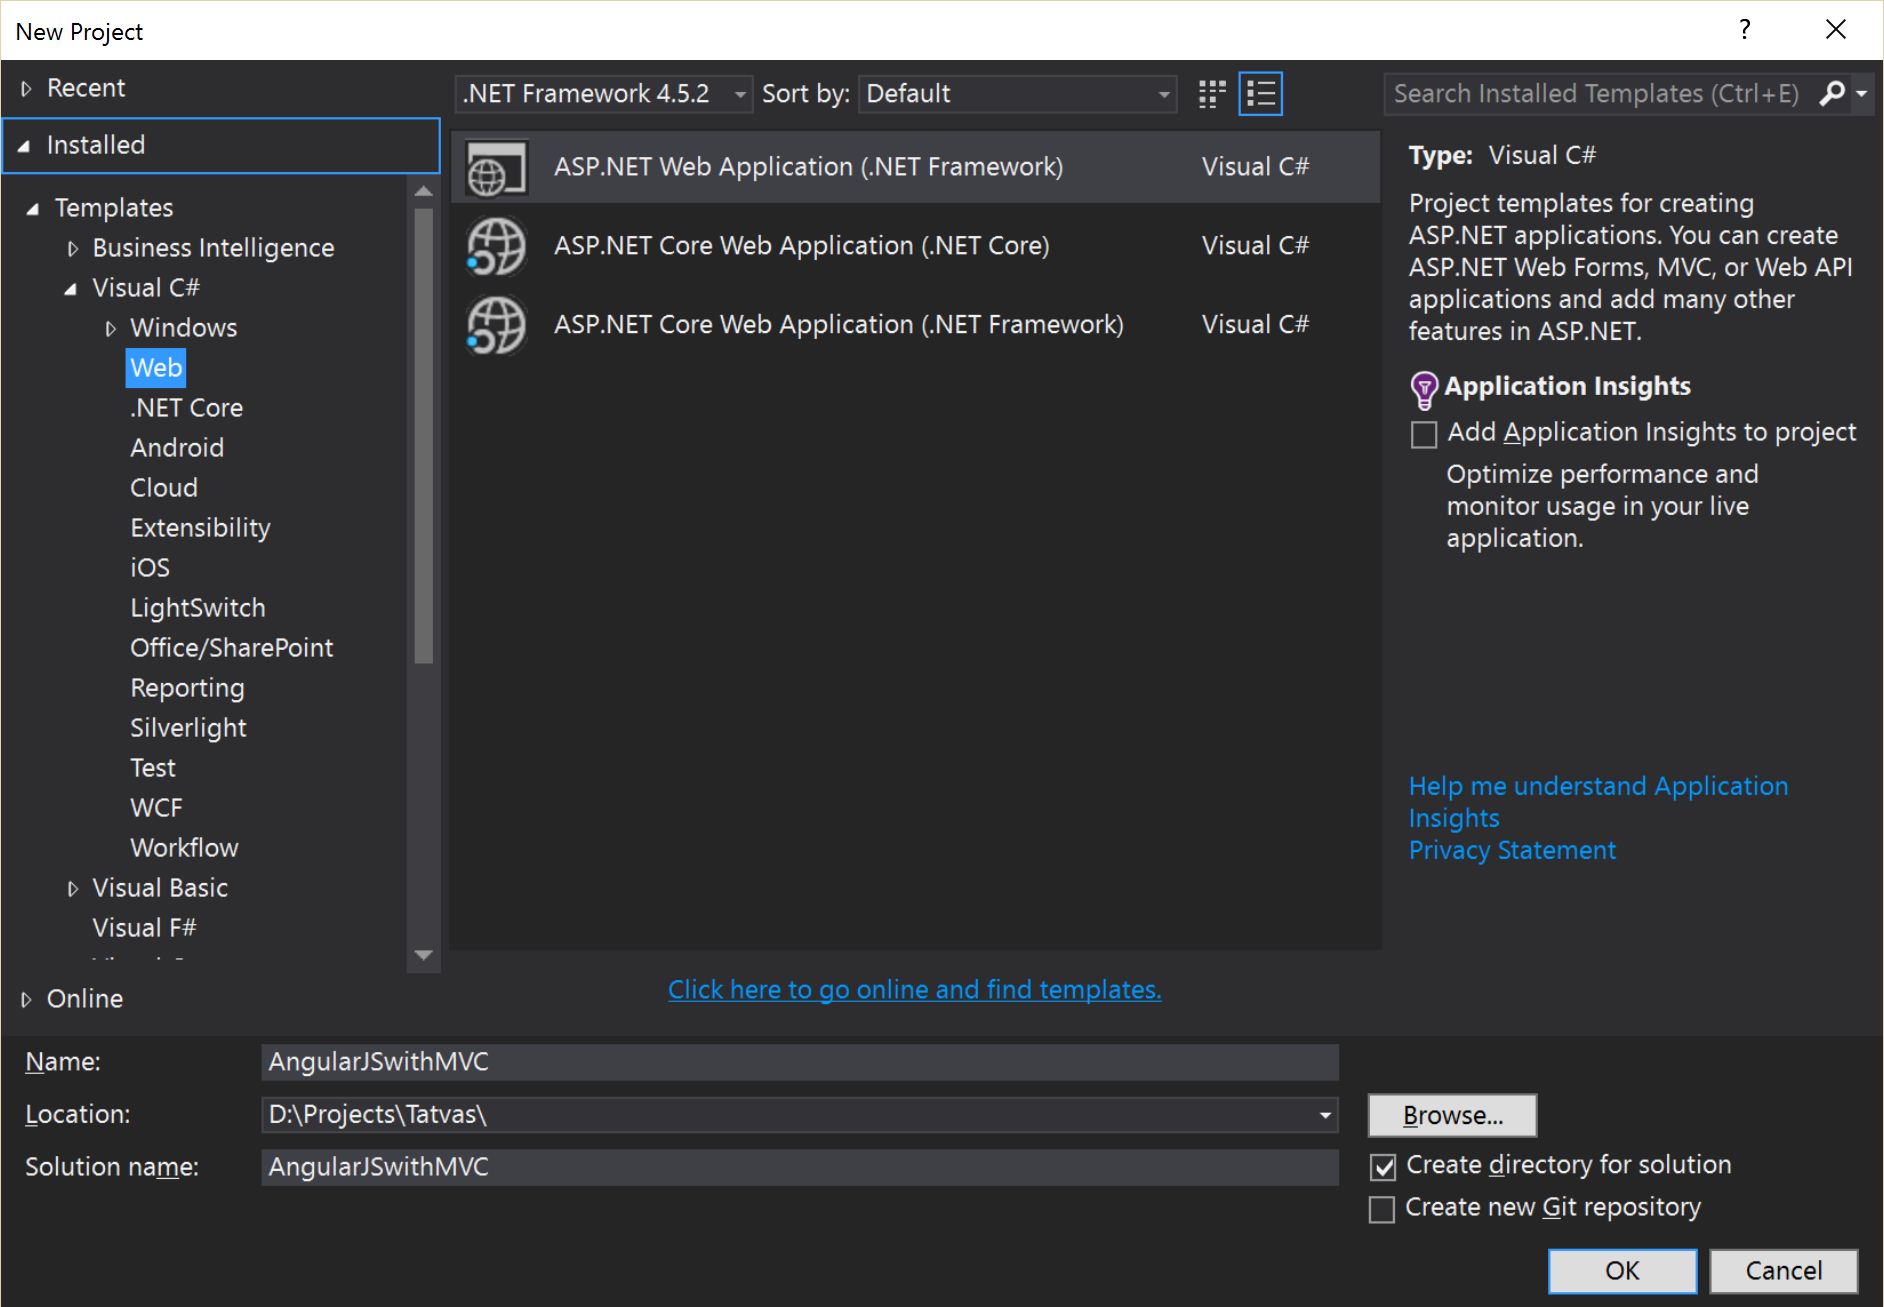
Open Visual Studio and select File -> New Project, where you can Select Visual C# -> Web from the left panel and then select Framework as .Net Framework 4.5.x (in my case I am going with 4.5.2). You have to select ASP.Net Web Application (.Net Framework) template for the project and then Name the project with a project location as shown in the image below. Click OK once you are done with it.
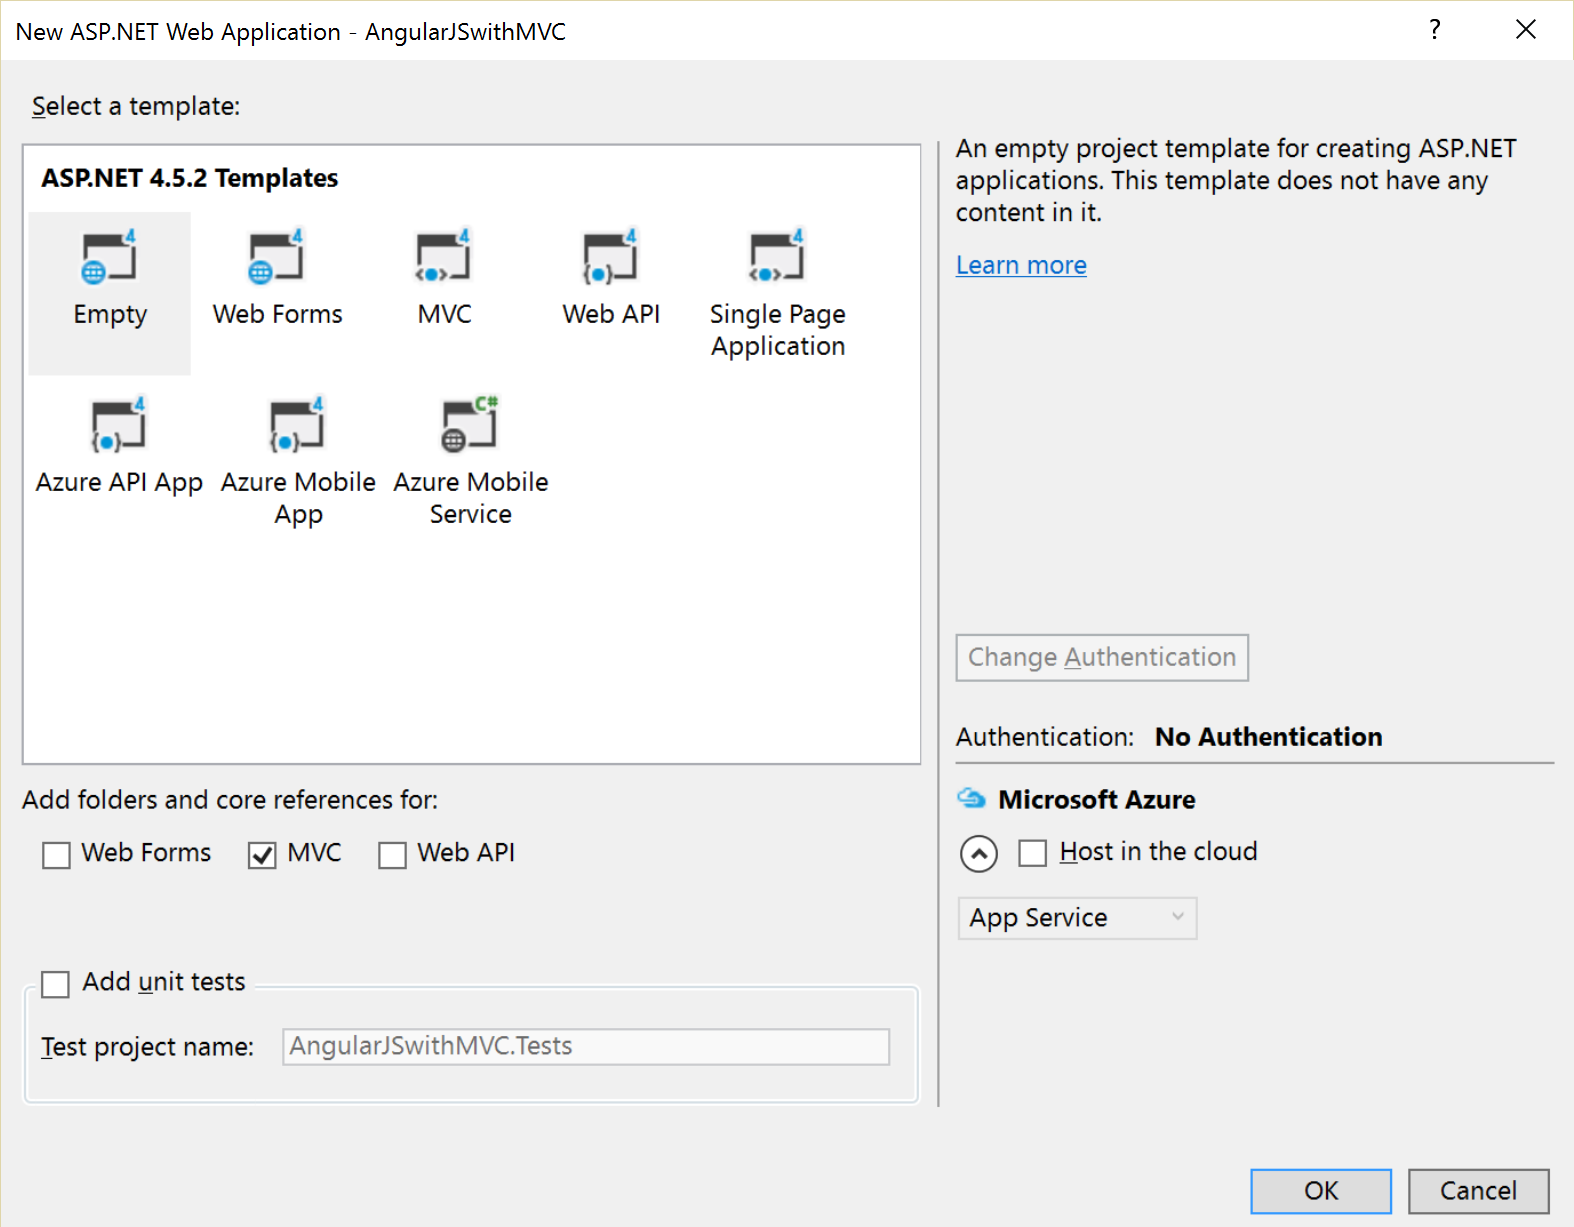
At this point you will be presented with another window, where you have to select project type template. As we are going to build this application from scratch up, we will be selecting Empty from the templates and MVC checkbox for the folders and references as shown in the image below. Click OK once you are done with this.
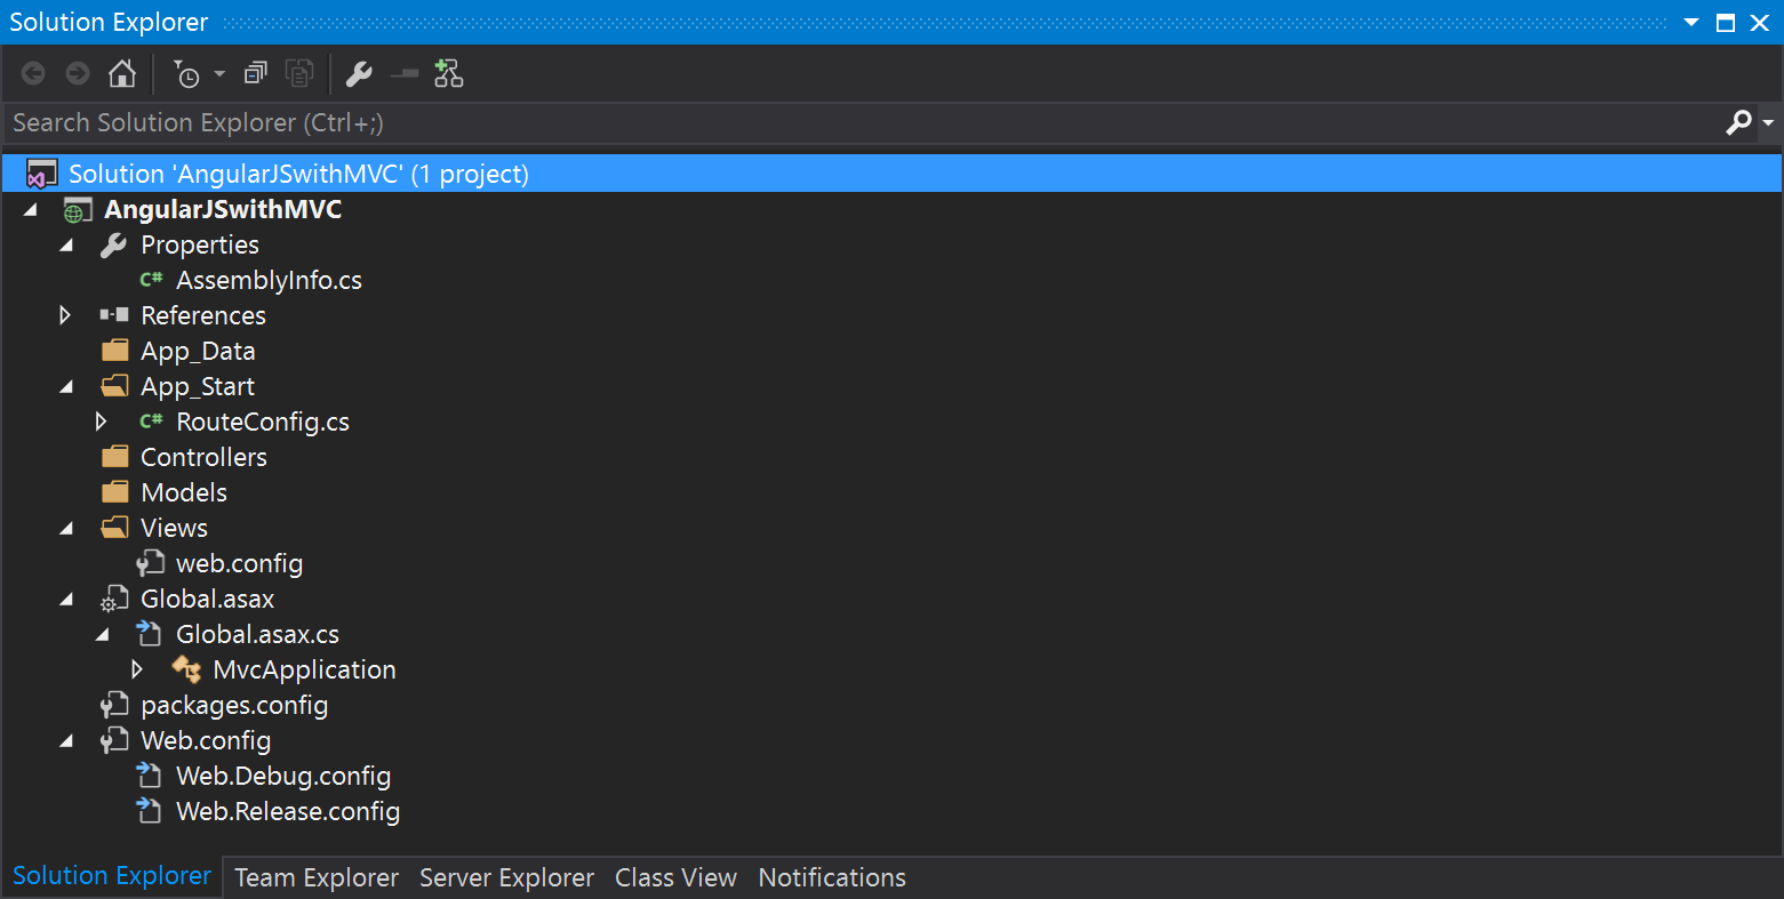
Visual Studio will create a project and open the same for you. Your Solution Explorer will be showing you a project structure as shown in the image below.
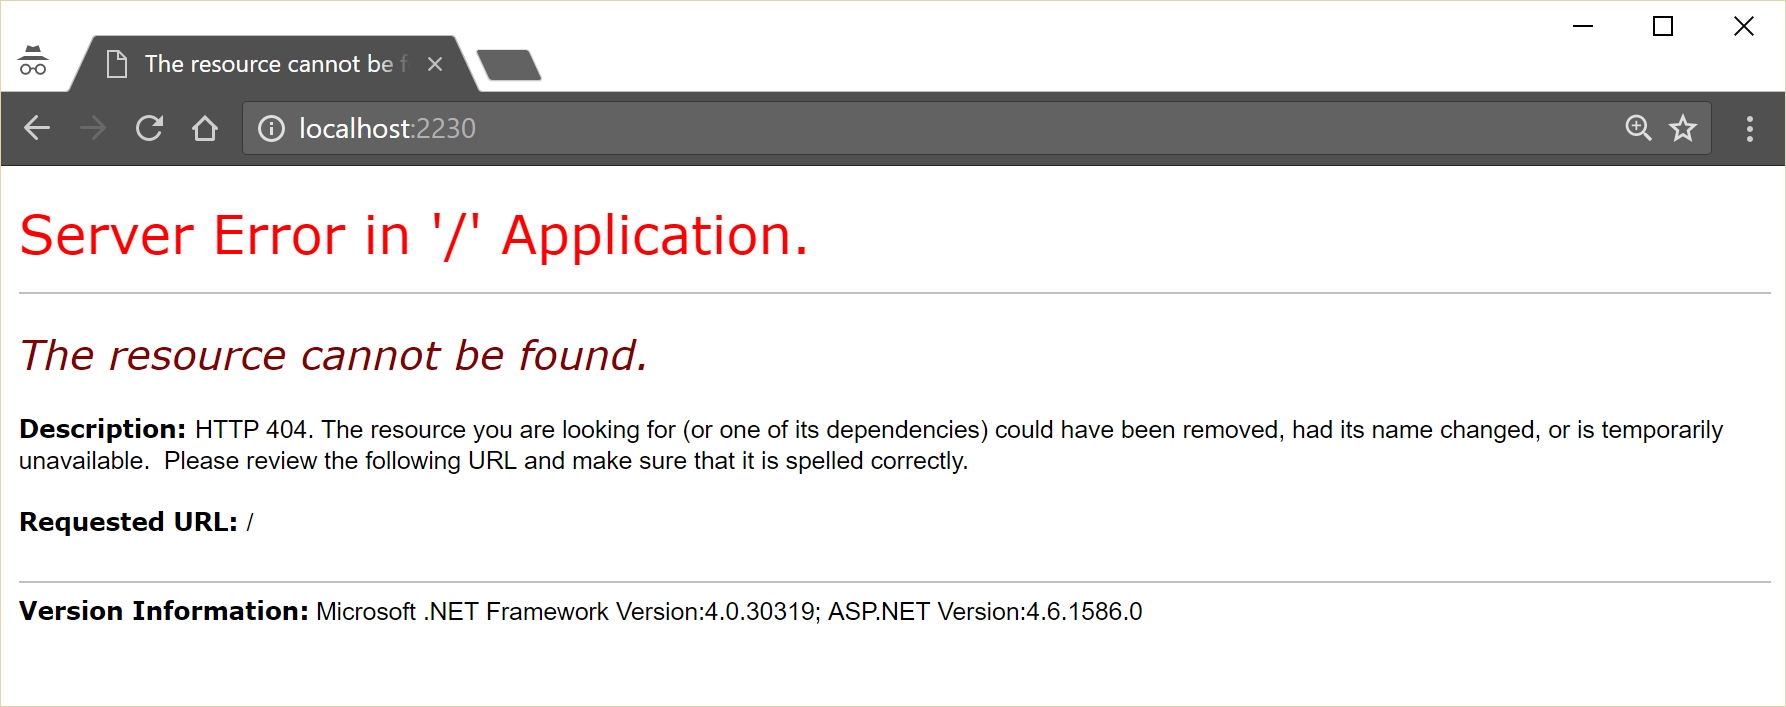
At this point you can build the project (Ctrl + Shift + B) but you are not able to run this project. If you run the project (F5) you will be presented with the page as show below.
In next step you have to update the packages and libraries which were installed by default with this template as there might be new versions available for that. To do that you have to open the NuGet Package Manager by right clicking the solution in the Solution Explorer and selecting Manage NuGet Packages for Solution option (as show in the image below).
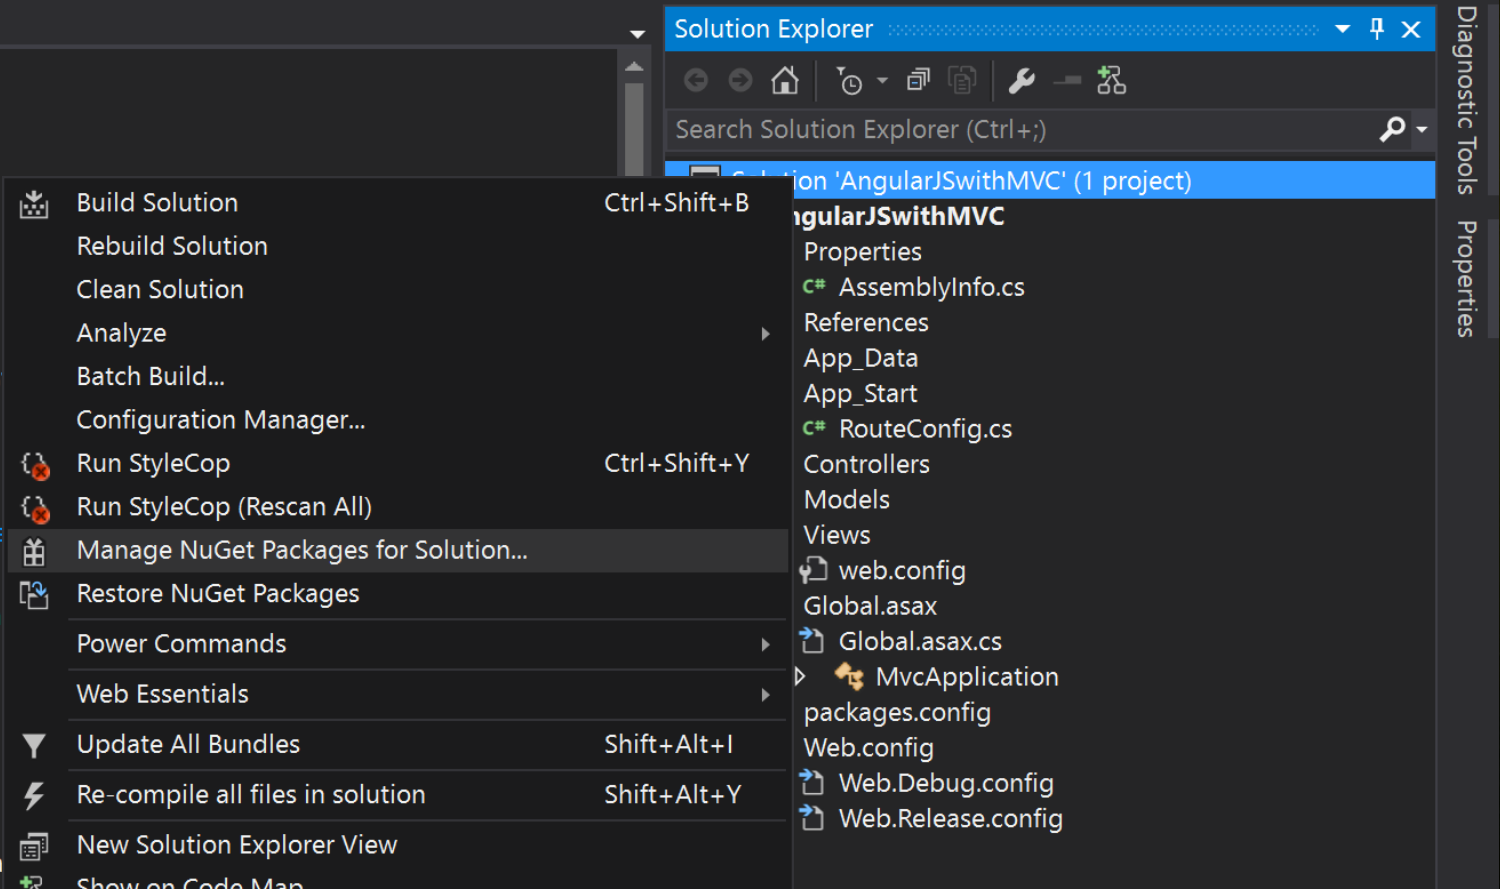
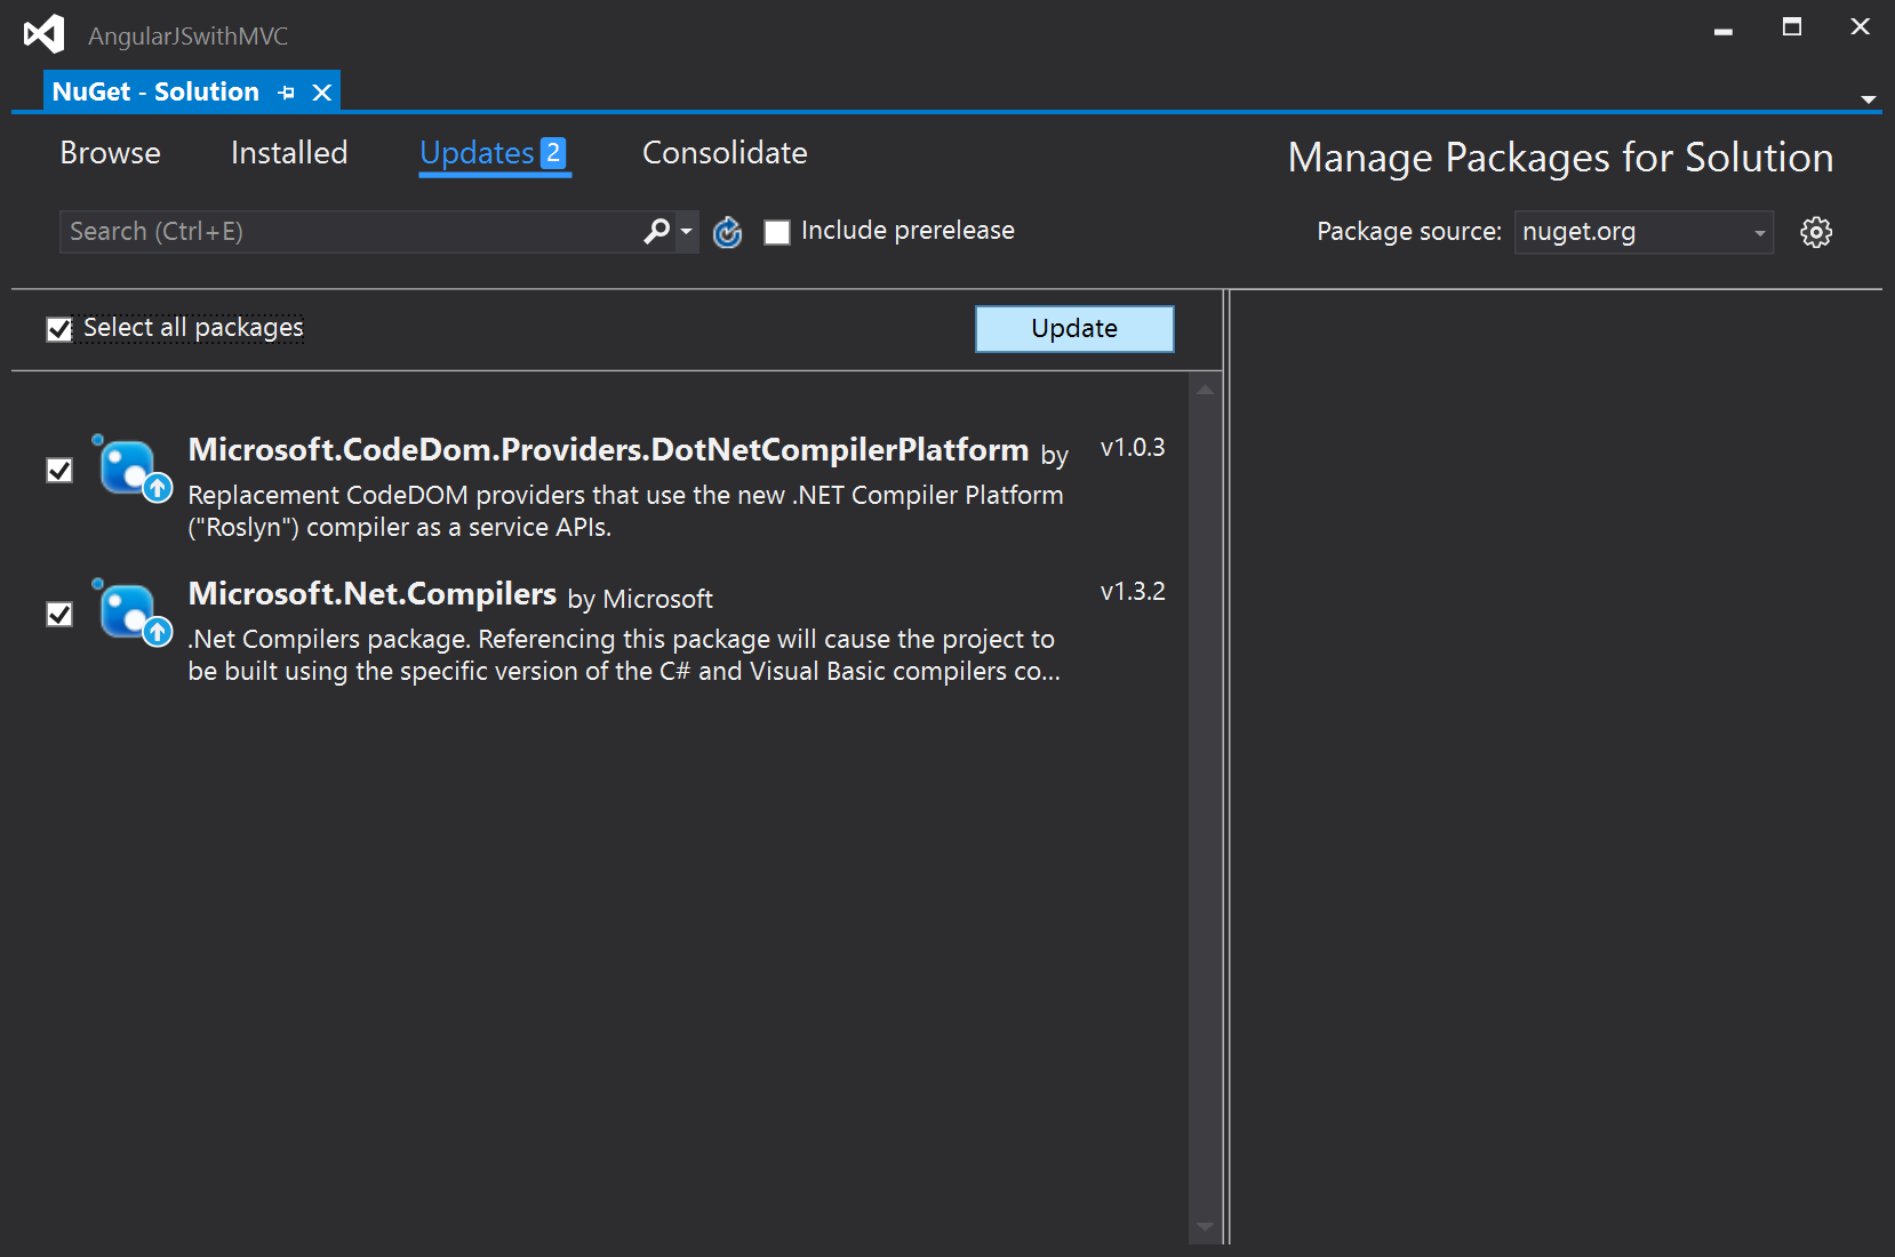
This will open a new NuGet Package Manager window, where you can find the updates for the installed libraries. In my case I have 2 updates available and I am going to update them by selecting all and clicking the update button at the top of the list (as shown in the image below).
If you have completed the above steps, you have reached to a point where you can start on the next part of this tutorial, where you will be able to add a start page showing a simple message to user by adding a controller and view to the project.
In case you have any questions till now you can leave the comments and I will try to answer them as quickly as possible. I will add the links to the next parts of this tutorial below here as soon as they become available. Your feedback will be really appreciated and will be helping me in writing more and accurate tutorials like this. Hope you will enjoy reading this series as much as I did writing it.
Series Links
Part 2 Part 3 Part 4 Part 5 Part 6 Part 7 Part 8 Part 9 Part 10 Part 11
Thanks for sharing..